Creating Items
Items are the building blocks of your project - tracking actions, decisions, issues, and questions. This guide shows you all the ways to create them.
What Are Items?
Items come in four types:
| Type | Purpose | Example |
|---|---|---|
| Action | Tasks to complete | "Install electrical panel in building A" |
| Decision | Choices that have been made | "Steel foundation was chosen" |
| Issue | Problems to resolve | "Water leak in second floor bathroom" |
| Question | Information needed | "What's the delivery date for windows?" |
Choose Your Method
Different situations call for different approaches. Pick what fits your workflow:
Best for: Office work, detailed items with multiple fields
Time: 2 minutes
When to use: You're at your desk with complete information and want full control over all fields.
Quick steps:
- Navigate to Items → Click + New Item
- Select type (Action, Decision, Issue, or Question)
- Choose project
- Enter title and details
- Click Create
When you need full control and detailed information.
Detailed Step-by-Step Instructions
Items Page Overview
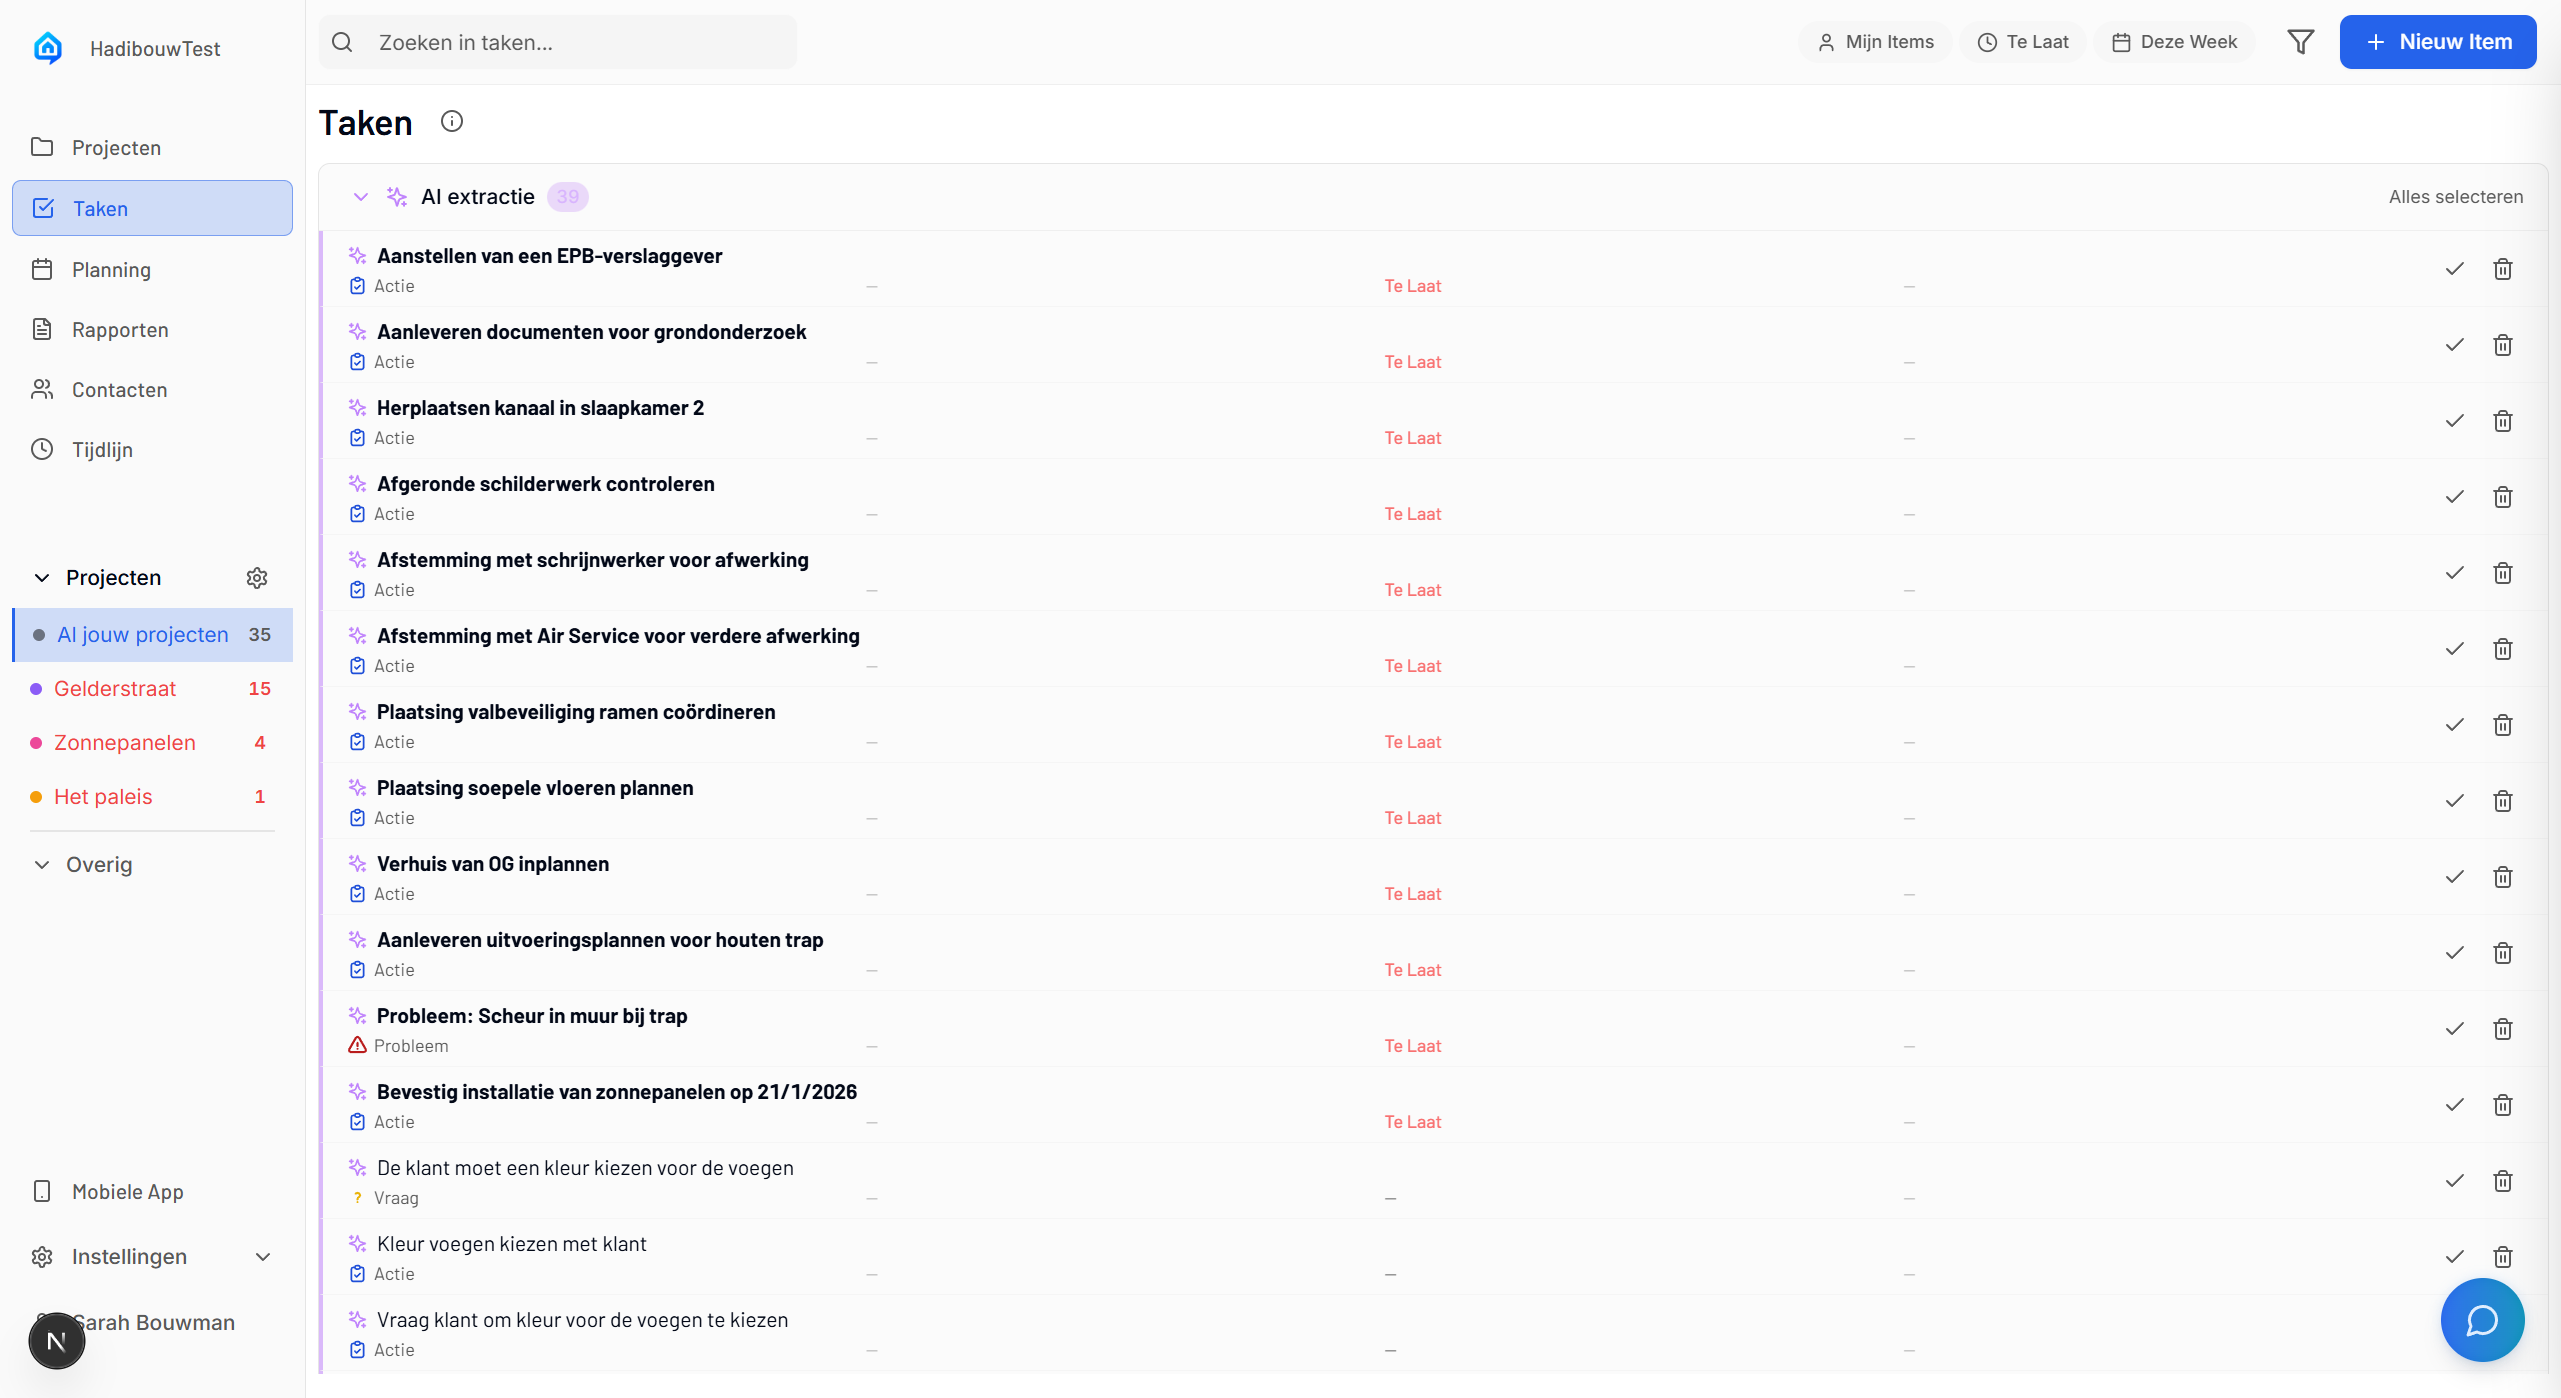
The items page shows all your tasks, with filters and the + New Item button in the top-right corner.
Opening the Form
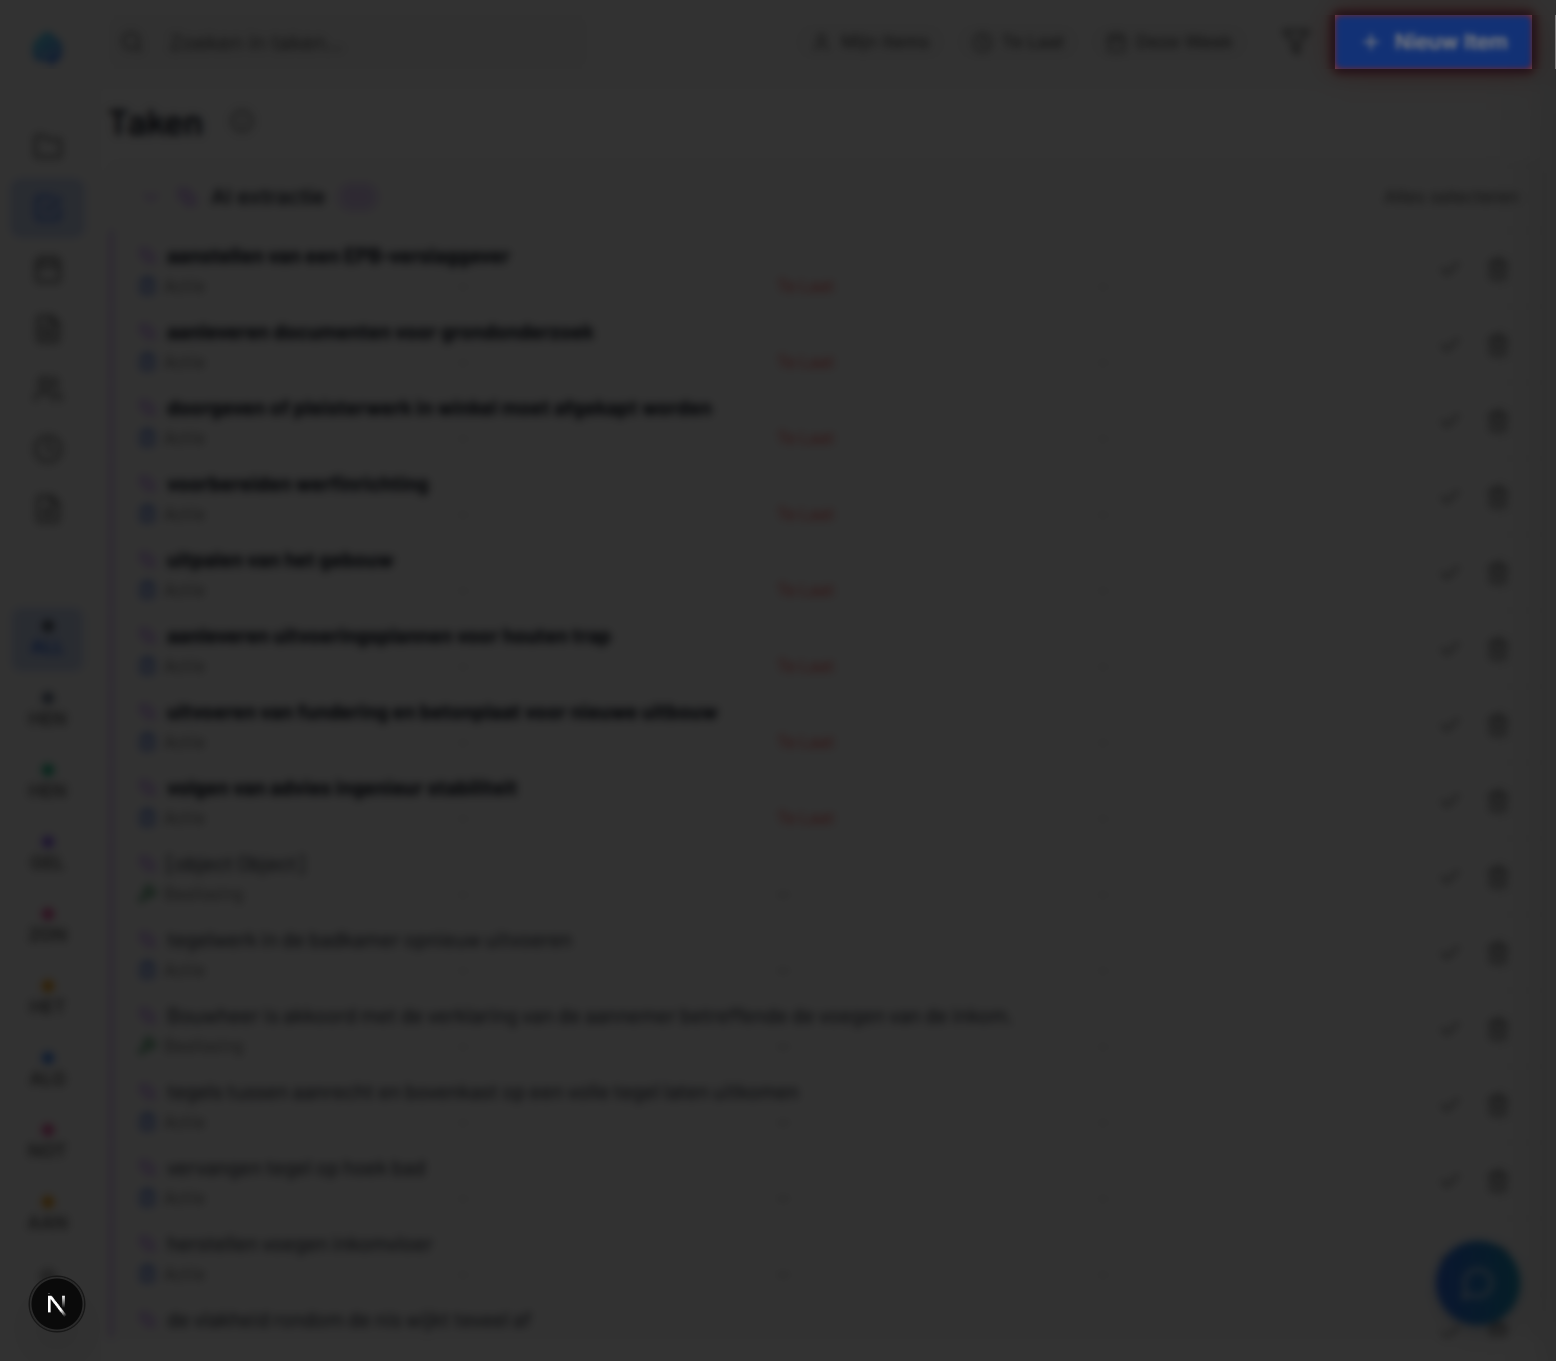
- Click Items in the left sidebar
- Look for the + New Item button in the top-right corner
- Click to open the creation form
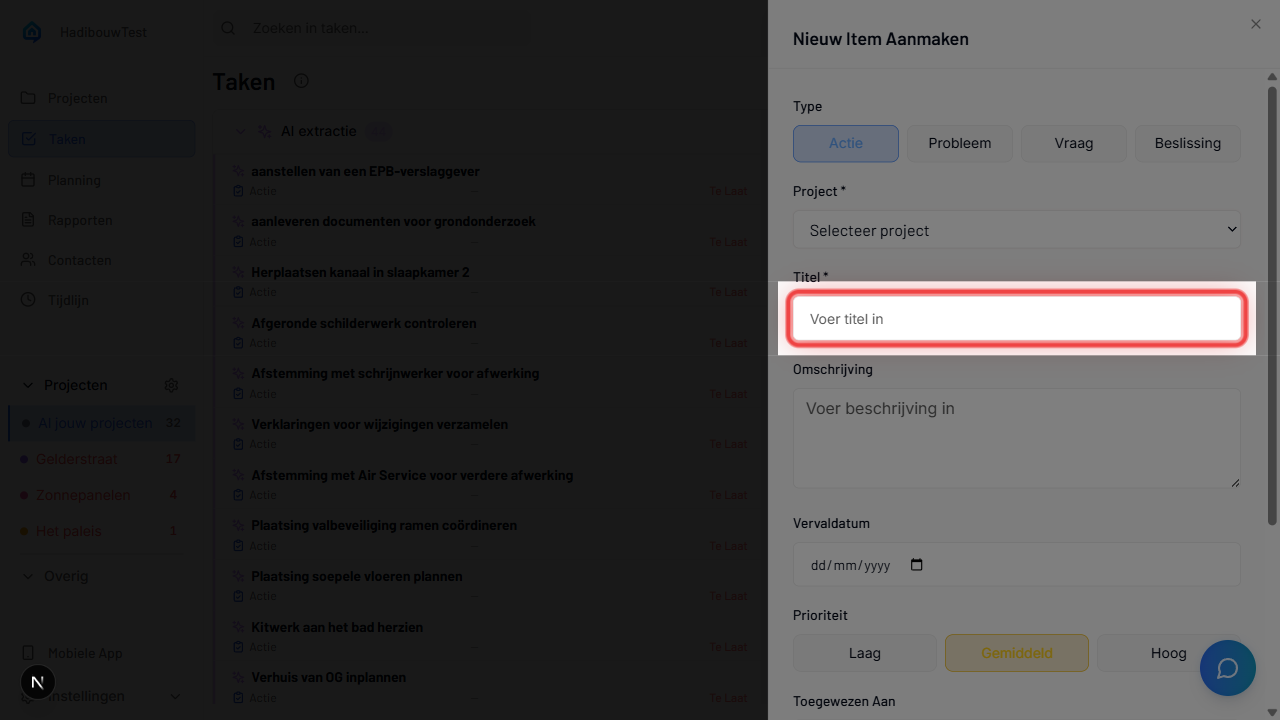
The Creation Form

The form contains all fields needed to create an item. Required fields are marked with an asterisk (*).
Required Fields
1. Select Item Type
Click one of four buttons: - Action - Tasks that need doing - Decision - Choices that have been made - Issue - Problems that need fixing - Question - Information you need
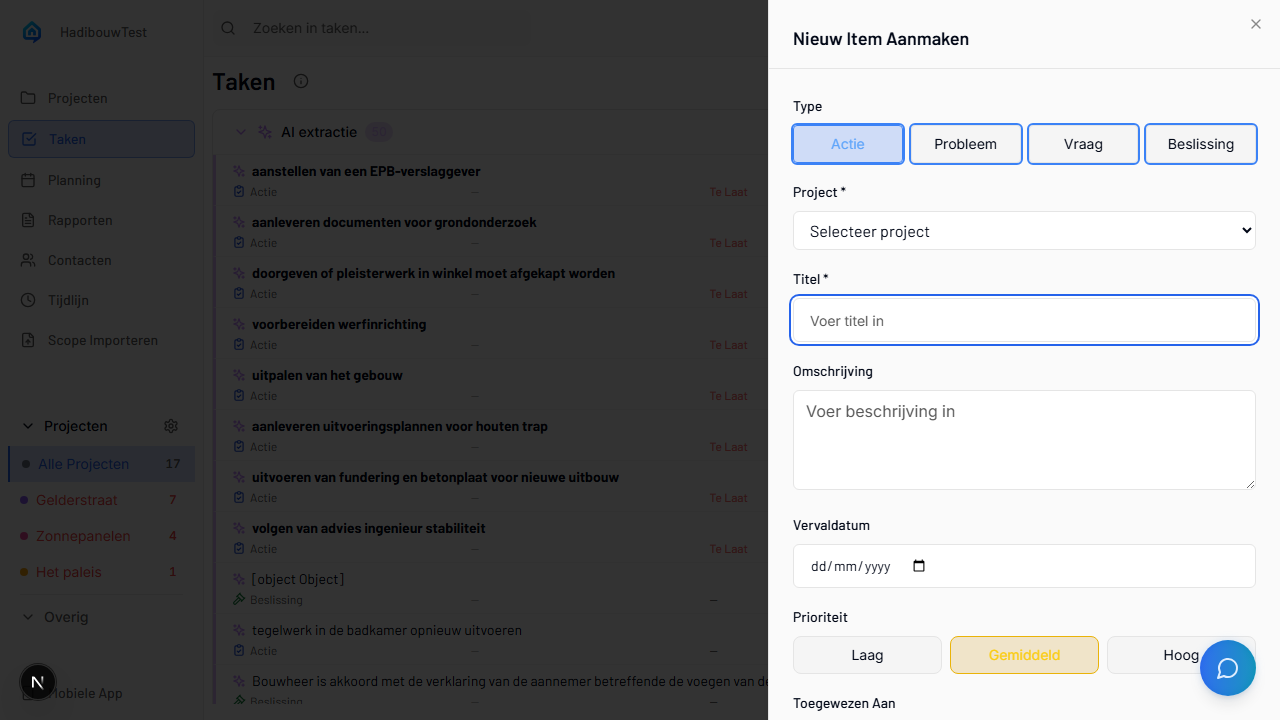
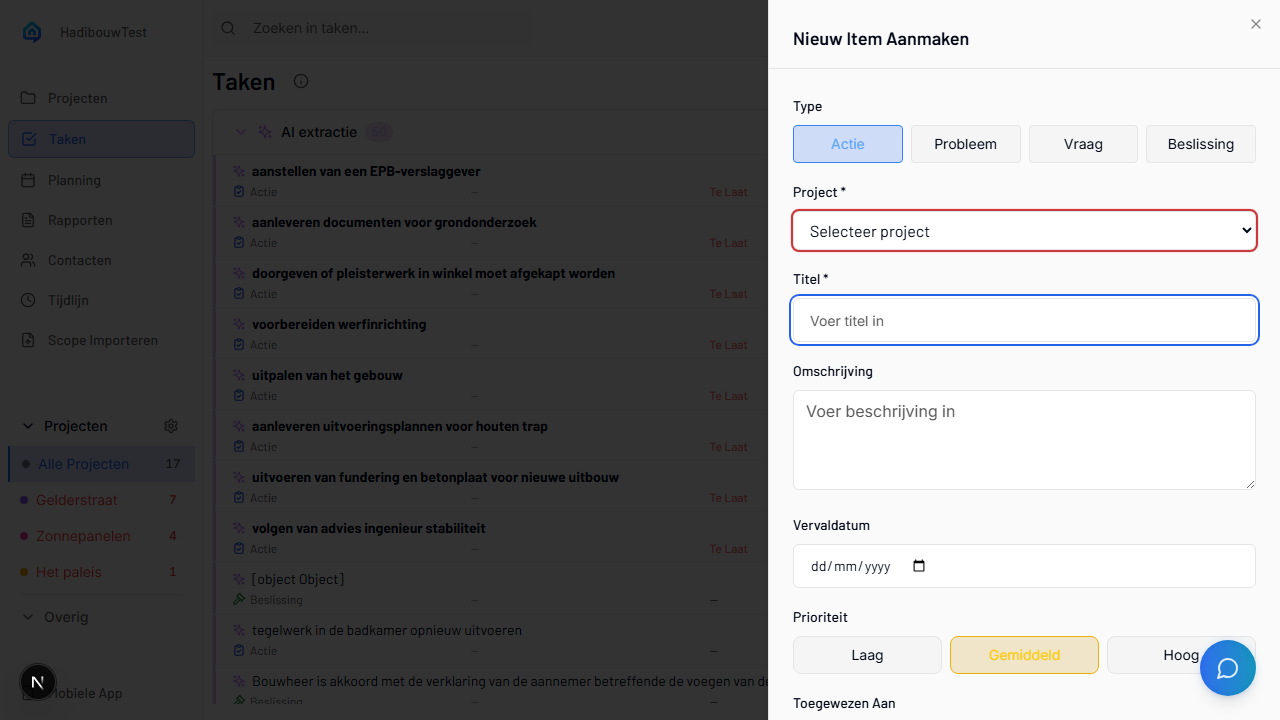
2. Select Project
Click the dropdown to choose which project this item belongs to.
3. Enter Title
Type a clear, descriptive title. - Good: "Water leak at second floor bathroom sink" - Avoid: "Issue" or "Problem"
Optional Fields
Description: - Multi-line text area with formatting support - Add specifications, context, or references - Use bullet points for clarity
Due Date: - Click calendar picker - Or type date in YYYY-MM-DD format - Leave blank if no deadline
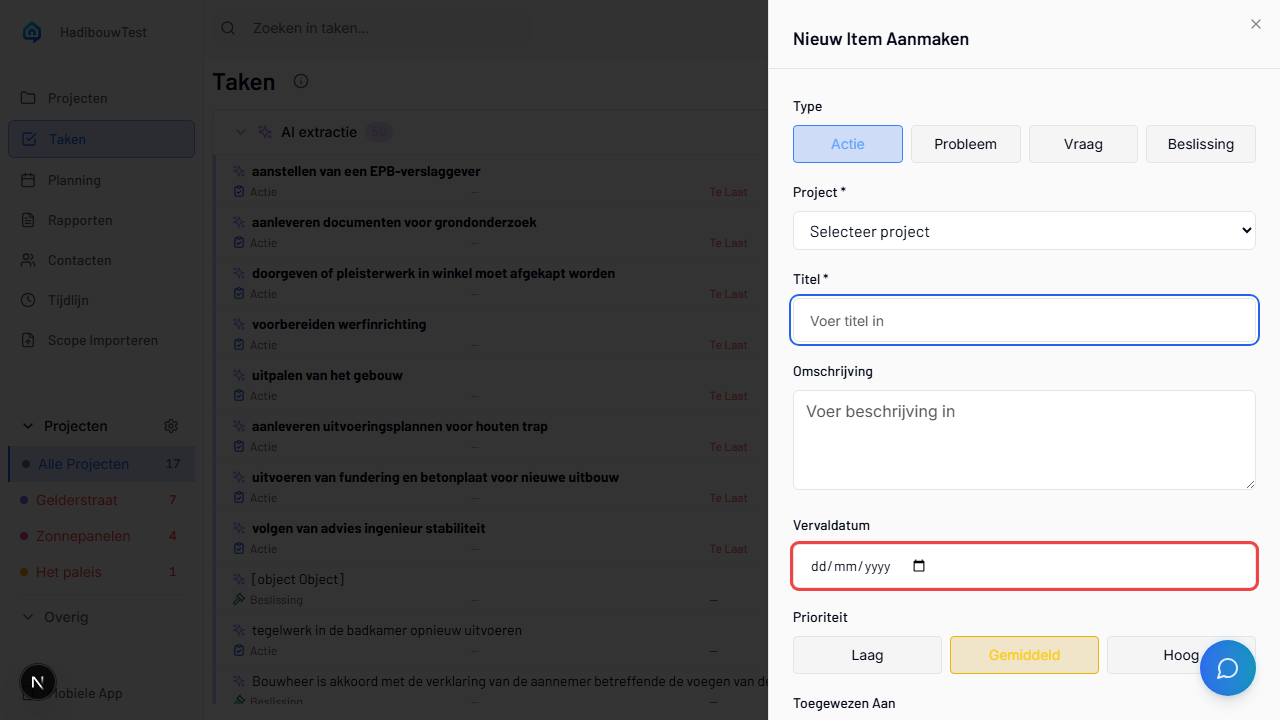
Priority: - Low - Can wait, nice-to-have - Medium - Normal workflow (default) - High - Urgent, blocks progress
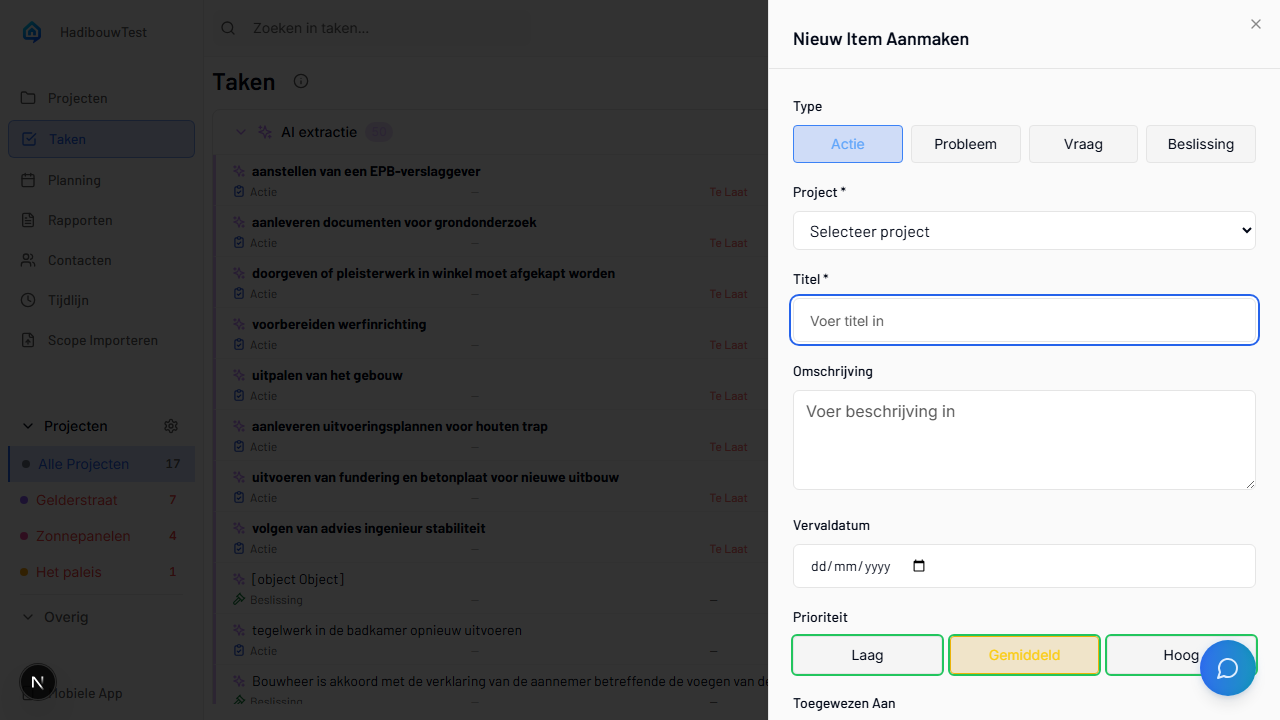
Assignee: - Dropdown shows team members - Leave blank for unassigned
Discipline: - Free text field - Example: "Electrical", "Plumbing", "Structural" - Helps route to the right team
Saving
- Review all fields
- Click Create button
- Item appears in the list immediately
Best for: Processing uploaded documents (PDFs, specifications, reports)
Time: 30 seconds per item (after AI processing)
When to use: You've uploaded project documents and want the AI to extract action items automatically.
Quick steps:
- Upload documents to project
- Wait for AI processing (2-5 minutes)
- Review AI-suggested items
- Accept, edit, or reject suggestions
Let AI extract items from uploaded documents.
For a complete explanation of document upload, AI processing, reviewing suggestions, and accuracy details, see the Documents Guide →.
Best for: Site visits, meetings, walkthroughs
Time: Automatic during site visit
When to use: You're on site and want to capture multiple observations with voice and photos in one go.
Quick steps:
- Tap Reports → + → Start session
- Walk around, speak observations, take photos
- End session
- Review AI-extracted items
Capture an entire site visit with voice, photos, and automatic item extraction.
What are sessions? Sessions bundle multiple observations from one site visit into organized, linked items. Walk around, speak what you see, take photos, and let AI separate it into individual action items.
Session Recording Details
Starting a Session
- Open the mobile app
- Tap Reports tab at bottom
- Tap + button
- Select New Session
- Optional: Give it a name like "Building A Walkthrough"
- Tap Start Recording
During the Session
Recording Indicator: - Tap Start Recording and tap again to stop - Red icon shows active recording - Timer displays duration - Keep each recording short, one task or problem per recording
During Recording:
Speak observations naturally: - "Water stain on ceiling near column B4, looks like roof leak, plumber needed" - "Electrical panel installed but not labeled yet, low priority" - "Question for architect: can we move this wall 2 meters north?"
Take photos: - Tap camera icon to take progress photos that don't need to go in the task list, only in the report - Tap the three dots next to the recording and there the camera icon, this links the photo to the resulting item - No limit on number of photos
Add text notes: - Tap text icon - Type quick notes - Useful for measurements or part numbers
Pause/Resume: - Tap pause to temporarily stop - Useful for private conversations - Tap resume to continue
Ending the Session
- Tap Generate report button
- AI begins processing immediately
- Each recording is reviewed
Reviewing Extracted Items
AI separates your recording into individual items: - Each observation becomes one item - Photos linked to relevant items - Type and priority auto-assigned - If the item already existed, it will be updated with the extra information or photos
For each item you can: - Accept as-is - Edit any field before saving - Reject if not needed
When done: Tap Save All to create all items
Session Report
After saving items, a session report is automatically generated.
For full details about report content, structure, and distribution, see the Reports Guide → and the Mobile App Guide →.
Draft Sessions
If you close the app before saving: - Session auto-saves as draft - Resume later from Reports tab - Drafts kept for 30 days
Best Practices
- Speak clearly but naturally
- Include location context ("near column B4")
- Mention urgency when important
- Take wide + close-up photos
- Name sessions by location or date
Best for: Single quick observations on site
Time: 15 seconds
When to use: You spot one issue and need to capture it fast.
Quick steps:
- Tap Items → + button
- Fill in basic details
- Optionally add photo
- Save
Create a single item fast when you're on site.
Quick Capture Details
Opening Quick Create
- Open mobile app
- Tap Items at bottom navigation
- Tap + floating button (bottom-right corner)
- Panel slides up with form
Filling the Form
Select Type (required) - Tap button: Action, Decision, Issue, or Question
Enter Title (required) - Tap text field - Type brief description - Example: "Fix broken door handle room 204"
Optional Fields: - Description - Add more details - Priority - Low/Medium/High - Due Date - Tap calendar - Assignee - Select team member - Discipline - Type or select
Adding a Photo
Two ways:
Option 1: Before saving - Tap Add Photo in form - Take new photo or choose from gallery - Photo attaches to item
Option 2: After saving - Save item first - Open item detail - Tap Add Photo - Photo attaches
Pinning Location on Plan
If your project has floor plans: 1. Create/open the item 2. Tap View Plans tab 3. Navigate to correct floor/drawing 4. Tap location on plan 5. Item pins to that spot
No GPS Tagging
SiteWhiz doesn't use GPS coordinates. Instead, you manually pin items to specific locations on your uploaded floor plans for precise positioning.
Offline Capability
- Create items offline (saved locally)
- Upload when connection restored
- Pending indicator shows unsynchronized items
Best for: Tasks that need information or checklists from your documents
Time: 30 seconds
When to use: A task that needs more information or you don't want to type.
Quick steps:
- Tap Question → Say or type "Create a task for..." for example "commissioning the heating system"
- The chatbot asks you follow-up questions
- Confirm that the task can be created
- Save
Tip: If you've added the manual for that gas chain to the project or procedure documents, the task will be created with a checklist or step plan based on the document in the cloud
After Creating an Item
Once created, items:
- Sync immediately - Visible on all devices (desktop + mobile)
- Appear in timeline - Tracked in project activity
- Become searchable - AI Assistant can answer questions about them
- Link to sources - Connect to documents, photos, sessions
Troubleshooting
For detailed troubleshooting for items, including session recording, AI extraction, photos and more, see the Troubleshooting Guide →.
Next Steps
Now that you can create items, explore:
- Projects Guide → - Organize items within projects
- AI Assistant → - Create items via chat
- Documents → - Extract items from documents automatically
- Mobile App → - Create items on-site with voice and photos